EmilyMorter

Month: October, 2014

Storyboard Process: Day Four

Day 4:

Day 4 merely consisted off fine lining the drawings and adding colour. I made the decision to colour my storyboard; I was aware that it is more time-consuming but when I create my animatic It will give me more of a sense on what is happening and how It will look. The picture below is a shot number one, my establishing shot of the forest. The colour shows what level and distance I’ll need to be at to achieve an establishing shot like the one shown on the storyboard and creates a clearer picture to assist me when creating the animatics.

FullSizeRender-5

First shot in colour

The picture below shows my final shot (a close up of half the girl’s face) it is clearly visible how the pictures contrast. The coloured picture is more visible are shows a clearer representation of what will be seen. By adding colour I will also what makeup needs to be added and where to place it. You can see from the coloured drawing that she will have blood on her teeth and dark red lips it also gives extra detail such as her having green eyes. This isn’t shown in drawings without colour

Screen Shot 2014-10-24 at 09.45.34

The contrast between the picture with colour and the picture without colour.


Storyboard Process: Day Three

The aim for shot 21 is to display location; I’m using a tilt to show the height of the trees which will symbolize how small the characters are and make the audience release that the the characters are defenseless.

DCIM100MEDIA

Shot 21 is a tilt shot of the location.


Shot 27 is an experimental shot. I want to show that the male character is hanging from a tree but I’m not sure if it will be clear to the audience what is happening. I’ll use a medium shot will the actors hold himself up in the tree, the shot will consist on the forest background and his feet swinging from a tree.

FullSizeRender-3

Shot 27 is of the male character’s feet hanging from a tree.

I’ll be using match on action during shot 30, 31 and 32. The action starts with the female character hiding behind a tree then using an arc shot around a tree to show the audience that this circle is the subject of attention. This will be followed by her hand gripping the tree. This sequence will create tension and continuity.

DCIM100MEDIA

Shot 31 is an arc shot around a tree which the female character is hiding behind

My final shot will be a close up of half of the villain’s face. I’m only showing half because during my questionnaire my target audience said not seeing much of the frightening character is more scary than seeing too much. She’ll be smiling and I’ll zoom into her smiling and then fade out black, this is when the title will appear. In the background i’ll have a quiet audio of her laughing.

FullSizeRender-4

Shot 43 is the final shot which shows the scary face smiling.

Day three is a tedious process of completing the drawings of the rest of  the shot list. Once I’d finished the storyboard I felt as It was missing something; none of the pictures stood out and the fluidity of the opening sequence didn’t seem clear. This is why I felt an extra session was needed to improve my storyboard.


Storyboard process: Day Two

Day 2:

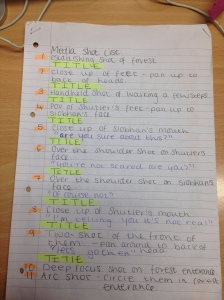
Day 2 in my storyboarding process was simpler as I just needed to draw the shot list onto the storyboard template and write the annotations, such as a brief description of the shot, shot type and duration etc. I did this first before drawing as it created a structure for me to follow. My problem was not knowing the music or sound effects as I haven’t looked for them yet. I want to record my own audio, for expamle walking on leaves and heavy breathing etc. Also the duration of the shot was tricky, i didn’t want the shots to be long but i needed the duration to total roughly two minutes.I made the mistake of writing in pen and then accidentally writing the wrong camera movement and having to cross it out but the storyboard is only to assist me when filming.

DCIM100MEDIA

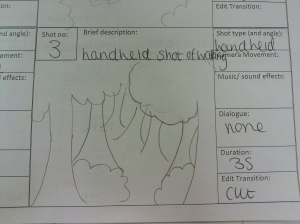
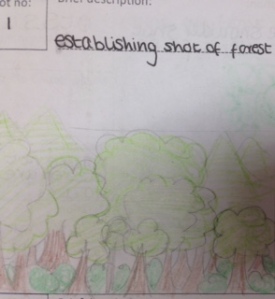
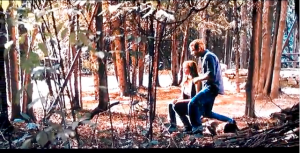
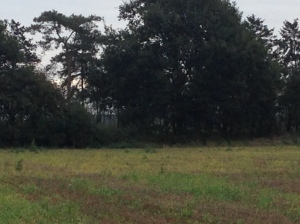
Shot 3 is a handheld shot of the characters walking into the forest entrance.

As the first 10 or so shots will be divided my titles, I can make the shots a mix of characters and location without worrying about the fluidity. Shot number 3 will be a location based shot which should show the forest entrance. By using a handheld shot I can show the audience the nervous and shaky perceptive of the characters.

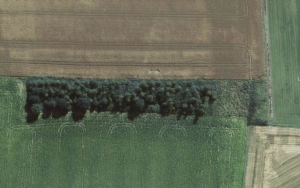
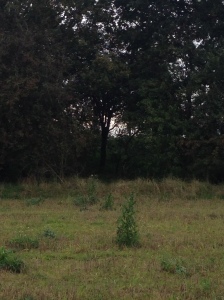
Shot 10 is a deep focus shot of the character’s back whilst they stare at the forest entrance. It will create tension and show the apprehensive attitude about entering the forest. It will also show location whilst focusing on the character. This will be cut by the film titles.

FullSizeRender

Shot 10 is a deep focus shot on the forest’s entrance.

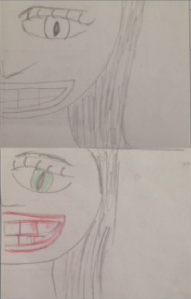
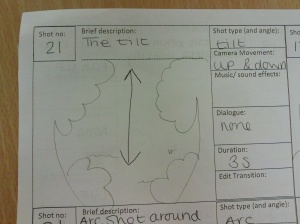
A few shots later I’ve decided to use a dutch tilt whilst the characters are walking as it will suggest disorientation and will the exaggerate the genre of the opening sequence. Using a variety of shot will also entertain the audience. I will  then pan up for which the shot will be followed by a high angle shot of them walking. The transition will have fluidity yet show a contrast of the shots to intrigue the audience.

FullSizeRender-2

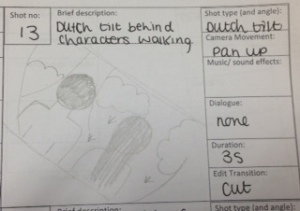
Shot 13 is a dutch tilt of the characters walking around the forest.

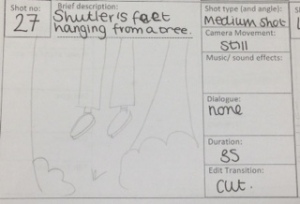
Shot 17 is a high angle shot of the characters walking beneath the trees. This will involve me sitting in a tree and filming the characters below. This effect will allow the audience to pity the characters as they’re viewed as small. It will also suggest danger an create tension.

DCIM100MEDIA

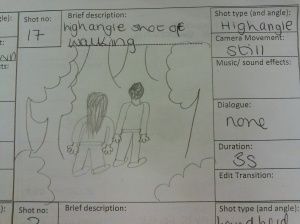
Shot 17 is a high angle shot of the characters walking below a tree. 

I still needed to complete roughly 20 more shots until my storyboard was finished.

Storyboard Process: Day One

Shot List –

Day 1:  

This was the longest day for the storyboarding process as I needed to visualise my final idea and from that create a shot list for my opening sequence. I started by watching previous horror opening sequences and totaling how many shots were used. ‘Checkmate’ in my opinion was the best opening sequence and that consisted of roughly 60 shots, other horror opening sequence consist of 40-70 shots. The more shots used will add extra detail. My aim when creating the shot list was to have 40 as a minimum but ultimately have 50.

IMG_2049-2

First page of shot list

The titles and production cards don’t count as a shot so I needed to intertwine this into my shot list. Knowing that it is conventional to have the titles outside on the action to split up the shots, I needed to put a title in after every line of dialogue in the beginning.

I knew my opening shot would be an establishing shot on the forest as i wanted to introduce the theme of the my opening sequence. I also know that the next shots would be of the character’s talking and that would take up 10 or more shots.

IMG_2050

Second page of shot list showing the colour -coded shots.

The confusing part of my shot list would be when the action taking place is in the future and i swap between future and present. I needed to colour code the different shots – orange will be shot that are in the present time but green will be shots that will happen in the future. This section of the opening sequence will create enigma codes and encourage the audience to continue watching the whole film.

I wanted my final shot to be of the monster’s face to show and then to fade into the titles. My completed shot list consisted of 43 shots which doesn’t reach my aim but when filming If I feel there needs to be more shots of location or more action then I’ll go back and amend my storyboard.


Prop Research

I’ll be using a variety of props in my opening sequence. A prop is a theatrical property which aids a perform making it more naturalistic or engaging for the audience. In my opening sequence, there is a section where the audience witness that the main characters deaths, a overlaid report will play while newspaper articles are shown of the teenagers. This allows the audience to experience enigma codes such as how did they die? or what killed them? etc and will hopefully compels them to continue watching. I will need a realistic newspaper prop and photographs of the victim in order to complete this effect. images

News report scene:

  • Photograph of victims
  • Newspaper articles
  • Fake blood
  • Face paint

Woodland Scene:

  • Baby oil
  • Costume, e.g gloves
  • Bracelet


The newspaper that I’ll print off to film. The bold words are words that I’ll focus on. 

Character Research

Female Victim – She is best described as quiet, almost introvert. She is sixteen and wants to be seen as popular which is why she agreed to accompany the male to the woods, in reality her friends would consider her timid.  She is petite with brown frizzy hair and brown eyes which shows the audience her youth and innocence. She has known the male since primary school and overhears his friends betting that he wouldn’t and impulsively states that she will join him. (picture) This character will be played by Siobhan Fitzsimons.

Screen Shot 2014-11-01 at 17.07.12

Siobhan Fitzsimons playing the female victim.

Male Victim – This male is confident and outgoing. He is tall and athletically built with matching brown hair and brown eyes. He enters the woods purely on a bet to prove he isn’t afraid. He has known the girl for a long time so feels comfortable by her accompaniment despite them being in different clichés. The male is also sixteen. This character is played by Joshua Shutler.

image

Joshua Shutler playing the male character.

Female Demon – The demon girl is only 14 years old, she is tall and lanky with long brown knotty hair. She has canvas white face with green piercing green eyes. Rumours spread through schools about her tale; she was brutally murdered in the woods and now she seek revenger on whoever enters her woods. She has fixated on what will scare victims, first she’ll stalk them until she is prepared to strike. She knows the male characters worst fear is being hung so she plans to execute him via this method and the girl gets panicky whilst being chased. This character will be played by Zia Potgieter.

Screen Shot 2014-11-04 at 20.11.31

Zia will be playing the female demon.


Costume Research

The female character played by Zia will be the ‘demon’ girl. To show her youth she’ll be wearing a cream dress, however the dressed will be dirty,  ripped and bloody to show the speculated rumours are true; this girl lives in the forest and murders people who enter. The dress will compliment the doll makeup as well when showing youth.

Screen Shot 2014-10-24 at 19.25.13

The dress which will be worn by the demon doll.

The male character will be wearing a plain white top and blue jeans. These are colours which are bright and will be seen better than dark clothing whilst filming. The white will also connate for innocence.The other female to enter the woods will be played by Siobhan, she’ll be wearing a black coat with a fur line hood to show the comparison of status between two female characters. The demon is in an old tatty dress where the other female is in a warm fur coat. This contrast will allow the audience to empathise with the demon or to allow the audience to relate to the female teenager.

Makeup Research

Makeup is essential for horror when making someone appear scarier or more realistic. If the makeup is done well a person can seem frightening and abnormal but if the makeup is overdone then the effect is lost and can even be seen as humorous. Through my questionnaire analysis I discovered that my target audiences find certain makeup features to be scary.

  1.  Dark eyes
  2.  Pale Face
  3. Red Lips
  4. Bruised body

These features will be shown on the main female character. The youtube clip below of a makeup tutorial shows how to do all the features listed. The bruises I’ll create on her arms and on her neck as these are the main parts of her body which will be visible.

The teenagers in the woods will have simpler makeup. I’ll have some water to spray onto the female characters neck to show as sweat when she’s hiding behind the tree. The main part of there makeup will be blood on their faces to show they’ve died. I Intend for the girl to have a gash on her head and this will be created using fake blood and red face paint. The boy shall have a bruised face and some minor cuts under the eye and on the jaw. This will show the audience that he fought against the demon whereas the girl died straight away. Both will have a small amount white face paint on to ensure they’re face is visible when filming outside in the dark.

Screen Shot 2014-10-24 at 19.25.28

The makeup kit which I’ll be using.


Location Research


My chosen location has been carefully selected. I thought about a number of factors when deciding the location such as accessibility and population factors (an area that lots of people will come to). Firstly my location was decided through the audience when I analyzed my questionnaire. The most popular answer was a dark forest. I needed to find an woodland area which was suitable to film in. The location I’ve chosen is close by and easily accessible for me and the actors to get to. Its a remote area so people can’t randomly stroll in and ruin a shot and we won’t be disturbed my road noise. As you can see from the picture below the area is a condensed woodland which means when inside it is quiet dark, this is ideal for filming as It will be dark but not too dark that the audience watching won’t be able to see what is happening. This is a classic convention of horrors. This is a top shot view of my location.

Picture 1

Once in the forest I will use the scenery to aid my cinematography. Putting myself high up in a tree, i can use a high angle shot on my characters below which tells the audience that they’re isolated and unprepared. The image below is from the horror ‘House at the end of the street’. The camera is behind the branches which creates a effect of being hidden, it draws the audience to characters on screen yet still being visually aware that they’re enclosed in a forest.

Picture 1

The picture below shows the forest from a little distance the pictures shows the how secluded the forest is. A establishing shot from this distance would set the genre and mood to the audience. It also show the darkness within the forest, this is a key convention of a horror.

IMG_1843

The final picture is a small entrance into the forest which would an ideal place for the two characters to enter. It would also be a good area to zoom in on. It would create the effect of being followed closer and foreshadow the closing danger on the characters.

IMG_1845


Title Analysis – The Shining

Picture 2

9-frame shot of ‘The Shining’ titles.

The story line of the title sequence is basic; its a yellow VW Beetle driving up a winding road to a destination. There is a variety of different shots such as the sequence shot and aerial shots to show the the towering mountains, open lake and condensed woodlands. This is an unorthodox method for foreshadowing the themes of the film like isolation and madness. There is a birds eye view of the forest where you can track the car then a low angle shot of the road. The shots aren’t continuos but because of the car moving forward this regulates the shots to seem continuos. The audio is vital for this title sequence; a happy audio could completely change this opening sequence. The music is originally a slow paced brass instrument which then enhances to more instruments when the titles appear. Near the end of the sequence the audio has climaxed to give the audience the impression of fear for this destination. This effect has appealed to me; for my title sequence will synchronise my titles and audio so the individual features of an opening sequence appear as one. The titles slowly appear up from the bottom of the screen and rise to the top. The titles are in the center so the audience is drawn fully into them and they’re played whilst the action is happening. The colour connotation of blue can symbolize isolation and sadness, this  establishes to the audience that it is a psychological horror. The letters are all in capitals which is conventional of a horror to show significance. In my opening sequence I’ll have all the letters in capitals so the words stand out and it follows a conventional opening sequence of a horror.