
Storyboard Process: Day Four
by emilymorter
Day 4:
Day 4 merely consisted off fine lining the drawings and adding colour. I made the decision to colour my storyboard; I was aware that it is more time-consuming but when I create my animatic It will give me more of a sense on what is happening and how It will look. The picture below is a shot number one, my establishing shot of the forest. The colour shows what level and distance I’ll need to be at to achieve an establishing shot like the one shown on the storyboard and creates a clearer picture to assist me when creating the animatics.
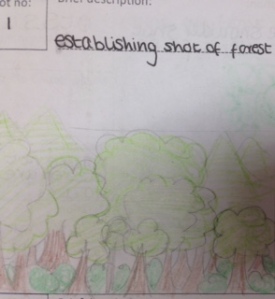
First shot in colour
The picture below shows my final shot (a close up of half the girl’s face) it is clearly visible how the pictures contrast. The coloured picture is more visible are shows a clearer representation of what will be seen. By adding colour I will also what makeup needs to be added and where to place it. You can see from the coloured drawing that she will have blood on her teeth and dark red lips it also gives extra detail such as her having green eyes. This isn’t shown in drawings without colour
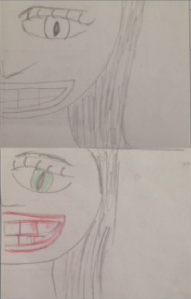
The contrast between the picture with colour and the picture without colour.

wow they are some good drawings
LikeLike